Why DIY Stucco Water Damage Repair Fails in Scottsdale and Costs More Later
If you have found a soft spot, a brown stain, or bubbling paint on your exterior wall, you are probably weighing a DIY stucco repair mistake against calling someone. In Scottsdale, that decision matters more than the how-to videos suggest. Our water damage does not come from steady rain the way it does back east. It comes from monsoon storms that drive water sideways into hairline cracks, and from drip lines and sprinklers that soak the same 12 inches of wall every single day. Patch over that without fixing the water source, and you buy the same repair twice.
This guide walks through the repair the right way, step by step. It also flags exactly where DIY attempts go wrong, so you can decide which steps to handle yourself and which ones to hand off.
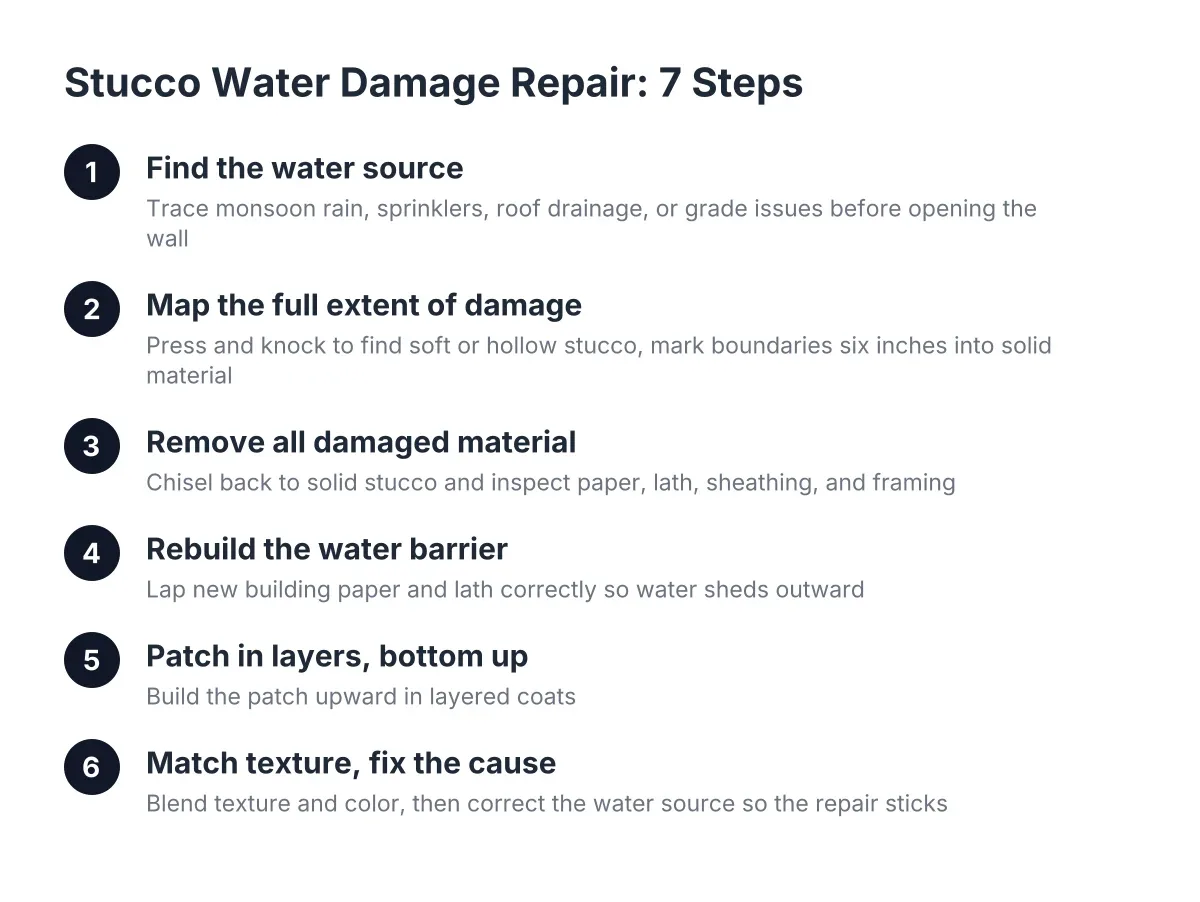
Step 1: Find the Water Source Before You Touch the Stucco
Do not open the wall yet. First, figure out where the water came from, because a patch over an active water source fails within one or two monsoon seasons.
In Scottsdale, water damage on stucco almost always traces back to one of these:
- Monsoon-driven rain entering through cracks, unsealed penetrations, or parapet tops, then running down behind the stucco
- Irrigation emitters and sprinklers hitting the bottom two feet of a wall daily, which shows up as a horizontal stain band near grade
- Roof drainage problems, where scuppers or missing gutters dump water down one section of wall repeatedly
- Grade and drainage issues, where water pools against the foundation after storms and wicks up into the wall
Walk the wall during an irrigation cycle. If a drip line or spray head wets the stucco, that is your cause, and no repair holds until you move or redirect it. Repeated heavy rain pooling near a foundation can also cause slight settling over time, which cracks stucco at corners and reopens patches. This diagnostic step is the one DIY guides skip, and it is the single biggest reason a DIY stucco repair mistake fails.
Step 2: Map the Full Extent of the Damage
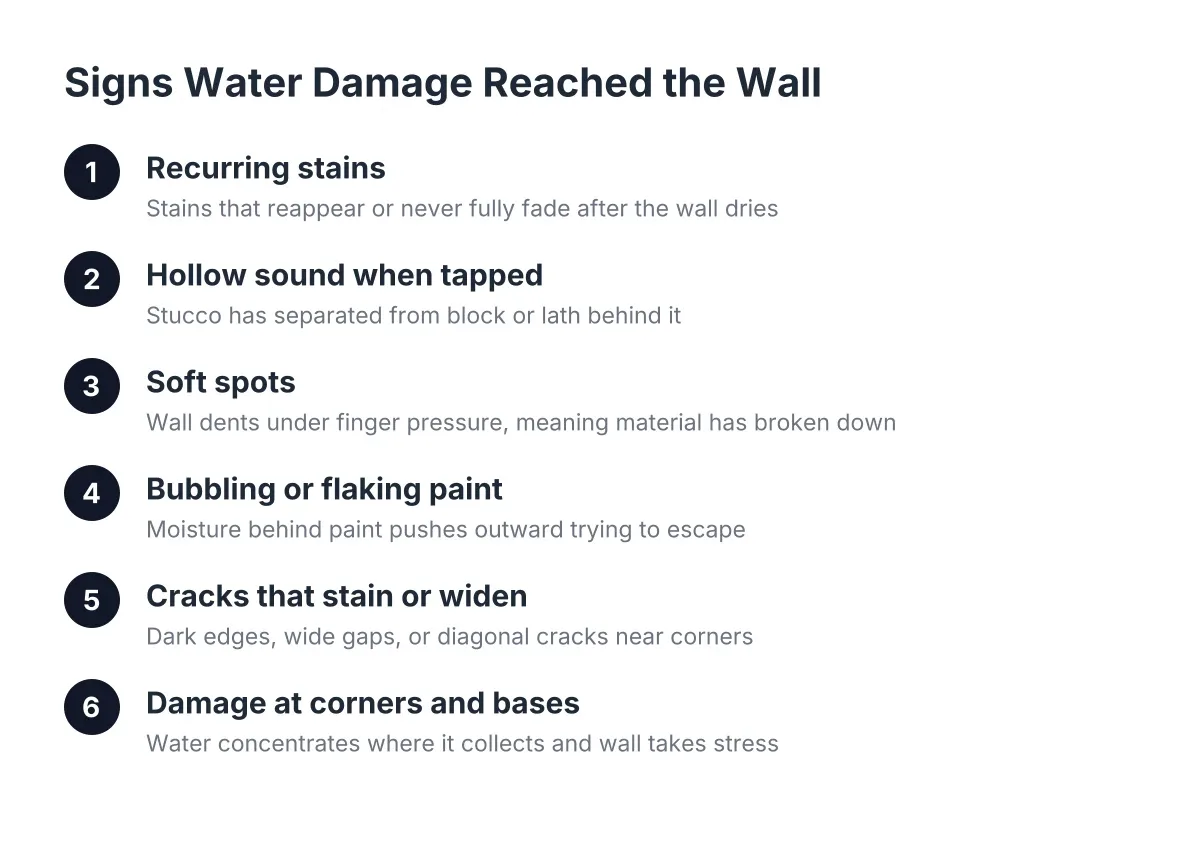
Water travels behind stucco, so the damage is almost always bigger than the stain. Press firmly on the wall around the visible problem area. Sound stucco feels rigid; damaged stucco flexes, crumbles, or sounds hollow when you knock on it.
Mark the boundary of every soft or hollow spot with a pencil, then extend your marks at least six inches beyond into solid material. Check low on the wall near irrigation, at corners, under windows, and below any roof drainage point. If you find soft stucco across a large section, or if the interior side of that wall shows stains, stop mapping and get a professional assessment. Widespread softness can mean the framing or sheathing behind the wall is compromised, and that is beyond a surface repair. Homeowners searching "water damage restoration near me" at that stage are right to; hidden mold behind a wall is a health issue, not just a cosmetic one.
One note for readers with block construction: if your damaged wall is a concrete or cinder block wall or fence, you have an advantage. There is no wood framing or building paper to rot behind the stucco. The repair is more forgiving, but the water source still has to be fixed or the new coat will stain and delaminate the same way.
Step 3: Remove All Damaged Material, Not Just the Ugly Part
Here is where most DIY stucco repair mistakes occur before the patch material even comes out of the bag. Every piece of loose, soft, or buckling stucco has to come off. Leaving compromised material in place lets the next storm keep expanding the damage underneath your fresh patch.
Use a hammer and cold chisel to remove stucco back to your pencil line, working to solid, well-bonded material. Wear eye protection; stucco chips fly. On a framed wall, inspect what you expose:
- Building paper or house wrap. If it is torn, brittle, or stained, it has lost its ability to shed water. On older Scottsdale homes, a crack left open for years lets the paper behind it dry out and turn brittle, and normal wall flexing then tears it. Torn paper must be replaced and lapped correctly so water sheds outward.
- Metal lath. Rusted or loose lath needs to be cut out and replaced with new lath fastened per the wall type.
- Sheathing and framing. Probe the wood with a screwdriver. If it is soft or dark, the repair is now a structural job, and this is the point to call a pro rather than close the wall over rot.
This is the layer where the DIY math turns upside down. According to Fixr.com, stucco repair nationally runs $900 to $3,000, averaging about $1,700 for buckled three-coat stucco in a 10×10-foot area. A failed patch that traps water against sheathing for two more years can push the job well past that range, because you are now paying for demolition, wood replacement, and the repair you skipped.
Step 4: Rebuild the Water Barrier Correctly
The waterproofing layer, not the stucco itself, is what keeps water out of your wall. Stucco is a hard, breathable shell; the paper behind it does the actual work.
Lap new building paper under the existing paper above the patch and over the paper below it, the way roof shingles overlap, so water always sheds toward the outside. Install new lath over the paper, fastened tight with no bounce. On a block wall or fence there is no paper layer; instead, make sure the block is clean, sound, and free of efflorescence before any base coat goes on.
If the original damage started at a crack, treat the crack as part of the repair. Wide cracks need proper backing before sealant; backer rod, a closed-cell foam cord, creates a foundation inside the crack so the sealant can flex without failing, according to Sika.
Step 5: Patch in Layers, From the Bottom Up
Now the actual stucco work. Two rules govern this step. Work from the bottom of the repair area upward, and never rush the cure between coats.
Before applying anything, wet down the edges of the existing stucco around the patch. Dry, sun-baked Scottsdale stucco wicks moisture out of fresh material fast, and a starved patch cracks and debonds. Dampen the substrate, then:
- Apply the scratch coat, pressing it firmly into the lath, then score it horizontally once it firms up.
- Let it cure, misting it in our dry heat so it does not flash-dry.
- Apply the brown coat, brought flush to just below the surrounding surface, and let it cure the same way.
- Apply the finish coat last, matched to the existing texture.
Avoiding common DIY stucco repair mistakes during curing is critical; skipping cure time is the classic shortcut, and in Arizona heat the temptation is strong because the surface looks dry within hours. Surface-dry is not cured. A patch that cures too fast shrinks, cracks at the edges, and lets water right back in.
Step 6: Match the Texture and Color, or the Patch Advertises Itself
A structurally sound patch that does not match still fails, at least in the way that matters to a Pre-Listing Seller. Buyers and home inspectors read an obvious patch as evidence of a water problem, sometimes an unresolved one. A visibly mismatched repair on a disclosure-sensitive wall can cost more in negotiation than the repair itself.
Texture matching is a hand skill. Scottsdale homes carry sand finishes, skip trowel, lace, and smooth finishes, and each is applied with a different technique. A patch with the wrong texture usually signals that someone repaired it without knowing the original method. Color is harder still, because the surrounding stucco has weathered under desert sun for years. Fresh color coat next to faded original stands out even when the pigment number is identical. Often the honest answer is to paint or fog-coat the full wall section from corner to corner rather than trying to blend a spot.
The same logic applies to corners. The technically correct fix for a deteriorated corner is to remove and repatch the whole wall section corner to corner. A spot patch on a corner is quicker and cheaper, and it can be a fair choice on a tight pre-listing timeline, but it is a trade-off you should make knowingly.
Step 7: Fix the Cause So the Repair Sticks
Return to what you found in Step 1 and correct it now, while the repair is fresh.
- Move drip emitters and adjust spray heads so no water hits the wall
- Add or repair gutters and downspout extensions where roof water was hitting the stucco
- Regrade soil so storm water drains away from the foundation instead of pooling
- Seal remaining hairline cracks on the same elevation before the next monsoon season
A patch without this step is temporary by definition. If the property has no gutters and water keeps gathering at the foundation, the same corner will crack again regardless of how well the patch was executed. In addition, avoid pressure washing the wall going forward; high-pressure water forced behind layered stucco creates the exact intrusion problem you just repaired.
Common DIY Stucco Repair Mistakes and When to Call a Professional
DIY stucco repair mistakes are avoidable on small, isolated soft spots on a block wall with an obvious, fixable cause, like a sprinkler head you can redirect. The materials are cheap, and a block substrate forgives imperfect technique.
However, hand the job off when any of these apply. The soft area is larger than about two square feet on a framed wall. The building paper is torn or the wood behind it is soft. There is any sign of mold behind the wall or staining on the interior side. You are selling the home and the repair has to pass an inspector and blend visually. In that last case, professional water damage stucco repair with proper color and texture matching protects the sale price, not just the wall.
Consider a hypothetical: say a homeowner near Shea Boulevard patches a stained strip along the bottom of a garage wall in spring, without noticing the drip line soaking it nightly. By September, after one monsoon season, the patch edges have cracked, the stain is back, and the sheathing behind it is now soft. The $60 weekend fix becomes a repair in the four-figure range that also has to be disclosed to buyers. That sequence, not bad troweling, is how most DIY stucco repair mistakes unfold. When the damage or the timeline is bigger than a weekend, searching "water damage near me" and getting a local set of eyes on the wall before you open it is the cheaper path, even in 2026 material prices.
Done in this order, with the cause fixed first and the cure times respected, a stucco water damage repair holds through monsoon after monsoon. Done out of order, it is a patch you will do again.
If you need stucco repair, Scottsdale Stucco Repair can help.
Prefer to talk it through? Call (480) 637-3464 — a quick call is usually the fastest way to get a straight answer for your situation.